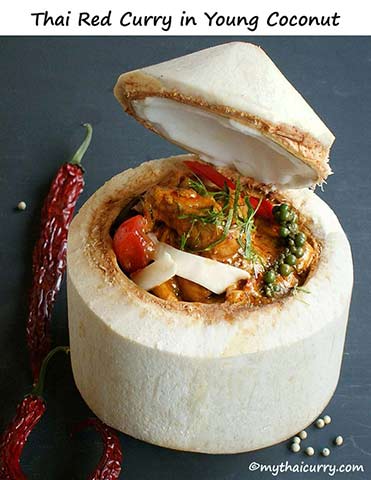
How to open a young coconut
June 19, 2023
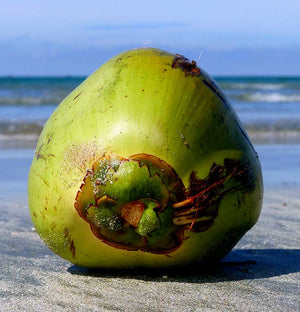
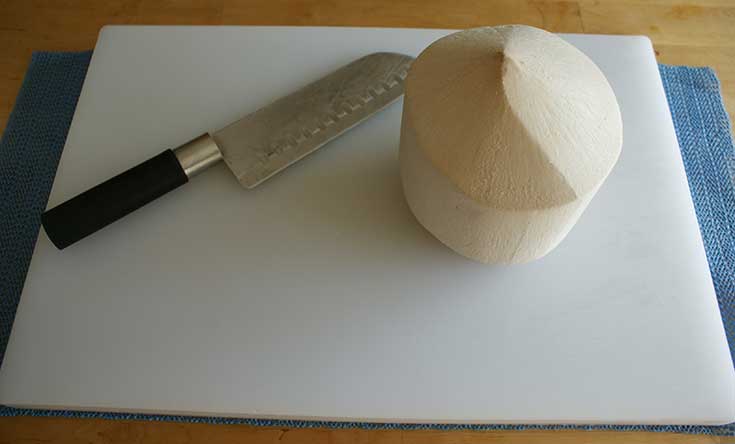
There are several ways to open a young coconut, however, if the aim is to keep the coconut shell to use as a serving bowl a little more care is needed. You will need a strong sharp knife as you see in the pictures. Most of the time I use a meat cleaver but not everyone has one so on this occasion I've used the type of knife can be found in most kitchens. You will also see that I placed a nonslip mat under my chopping board, if you don't have one of these just make sure your chopping board is in a position where it can't move about.
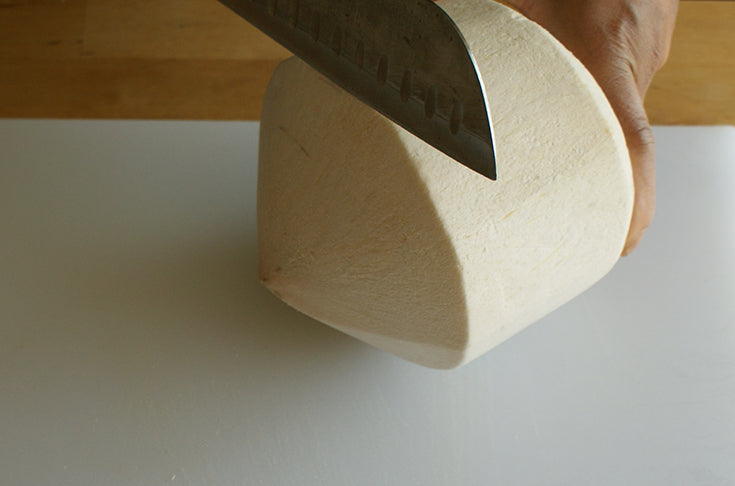
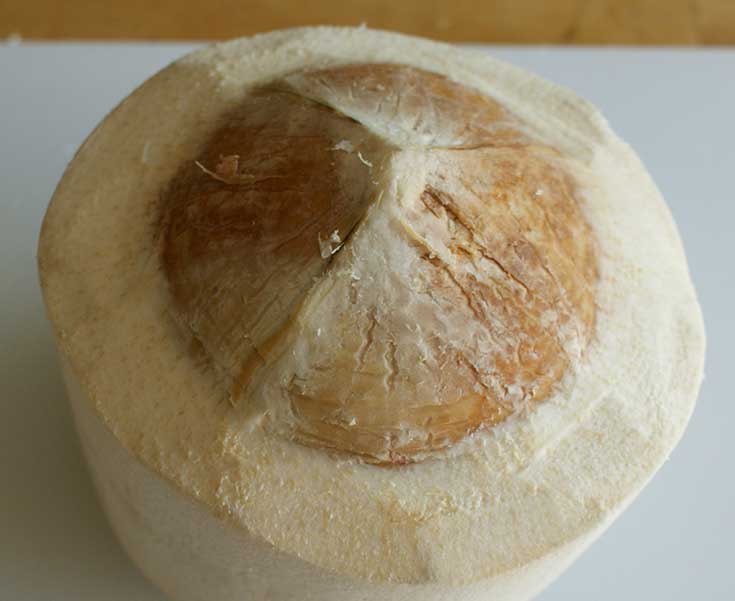
Start to carve around the edge of the coconut.
The aim is to shave from the edge of the tip in order to expose the dome of the coconut as in the pictures below.
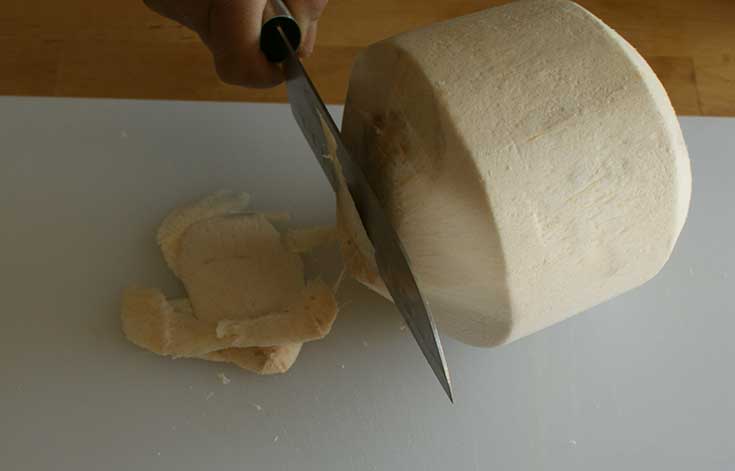
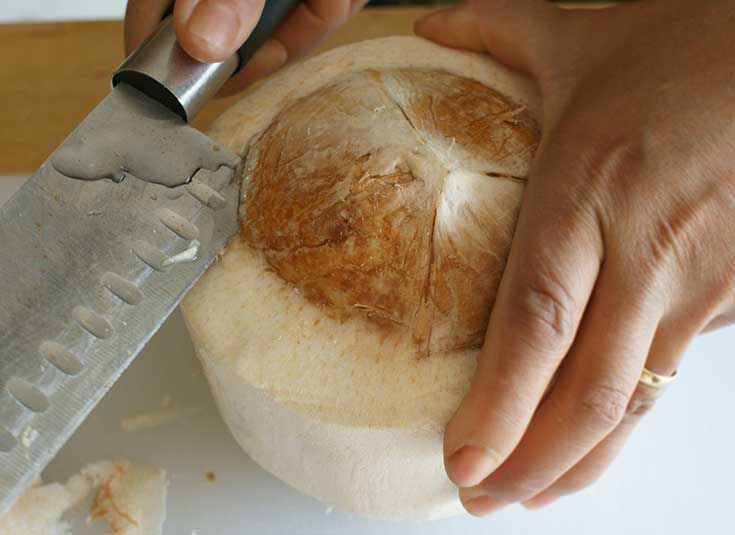
Now you want to be able to insert the end of your knife (never the tip!) into the edge of the dome. Don't do this along the lines that mark out the dome into segments, instead you want to get the knife in between those lines. If you are comfortable with being able to hit along the edge of the dome then do so. Alternatively, you may find it easier to place the end of your knife at the edge of the dome and tap it with something like a rolling pin or meat mallet until you got it firmly underneath the dome. However you do it, it's important that you hold the knife at about a 45 degree angle as this will help to ensure that you finish opening the coconut with the same amount of fingers you had when you started out :-)
When you start to see the coconut water dribble out you then start to work your way around the dome, now you can hold your knife flat. As in the picture just use the rear to mid area of the blade in a sawing type motion.
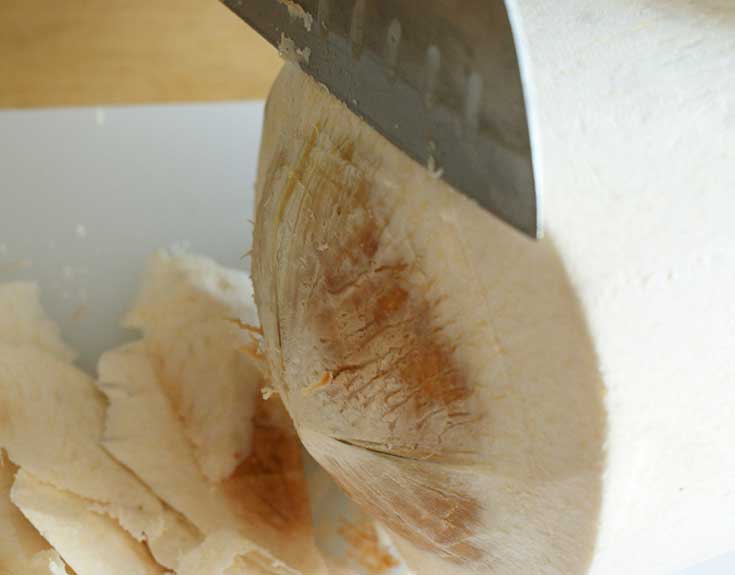
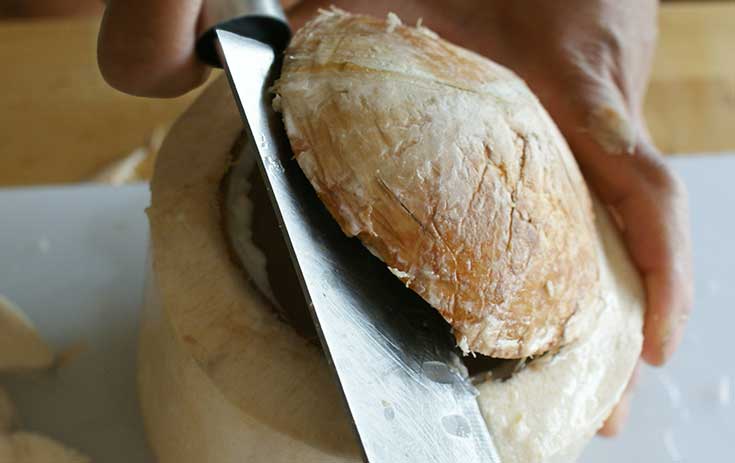
By the time you've worked your knife approximately halfway around the edge of the dome, you should be able to insert the knife and using the flat of the blade, lever up the coconut dome.
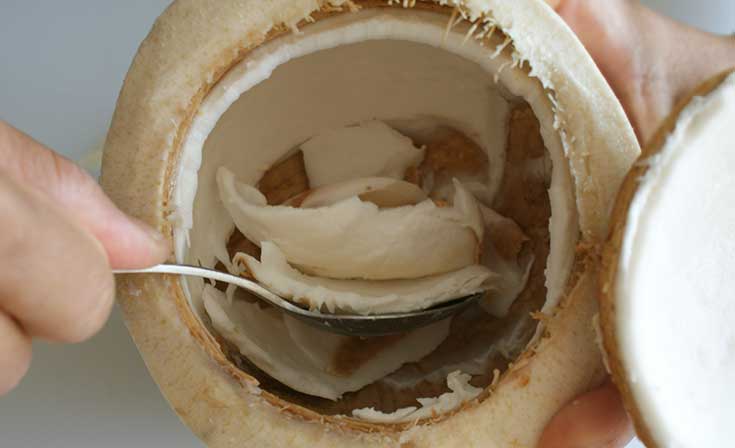
You now have access to the incredibly nutritious and wonderful tasting coconut water, don't waste it!
Use a spoon to scrape out the young coconut meat.
That's it, you're done now, congratulations :-)
.
Leave a comment
Comments will be approved before showing up.
Also in Blog

June 19, 2023
3 Comments
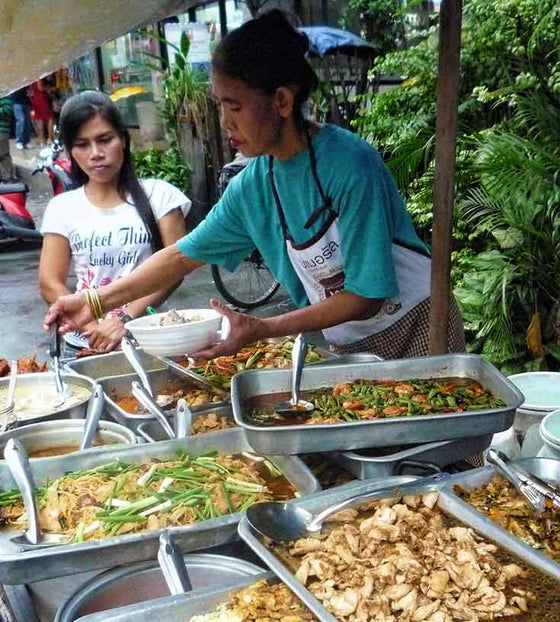
Like many others, I believe that Bangkok is the world’s street food capital. I know of nowhere else that can match the sheer variety of food available at almost any hour of the day and night. Despite this, many tourists choose not to sample the delights on offer, I call that sad :-( I used to think that the main reason for this was the fear of food poisoning. And I know that for some people this still seems to be a factor. Should this be the case? I really don’t believe so..
Continue Reading
June 19, 2023
One thing I have learnt from being asked this question by friends so many times is that they all mean different things by it. For some it will be the restaurant with the most spectacular views, for others, the best food. And, for those who have picked Thailand as their honeymoon destination, the most romantic. Because of this experience, I have now learned to give them all the same answer: “Google it!” It’s not that I’m being unkind or unhelpful, simply that what works for me may not work for..
Continue Reading

June 19, 2023
1 Comment
I love driving in Thailand. Or to be more accurate, I love being driven in Thailand provided I’m able to call out “Stop!” whenever we pass one of the many interesting food or produce stalls that abound on the highways. In fact I do this so frequently that unplanned overnight stops are a common occurrence. You see in the UK you have “Little Chefs” and the like and you could play spot the difference with those. In Thailand you’re more likely to be confronted with roadside eateries disguised as ...
Continue Reading